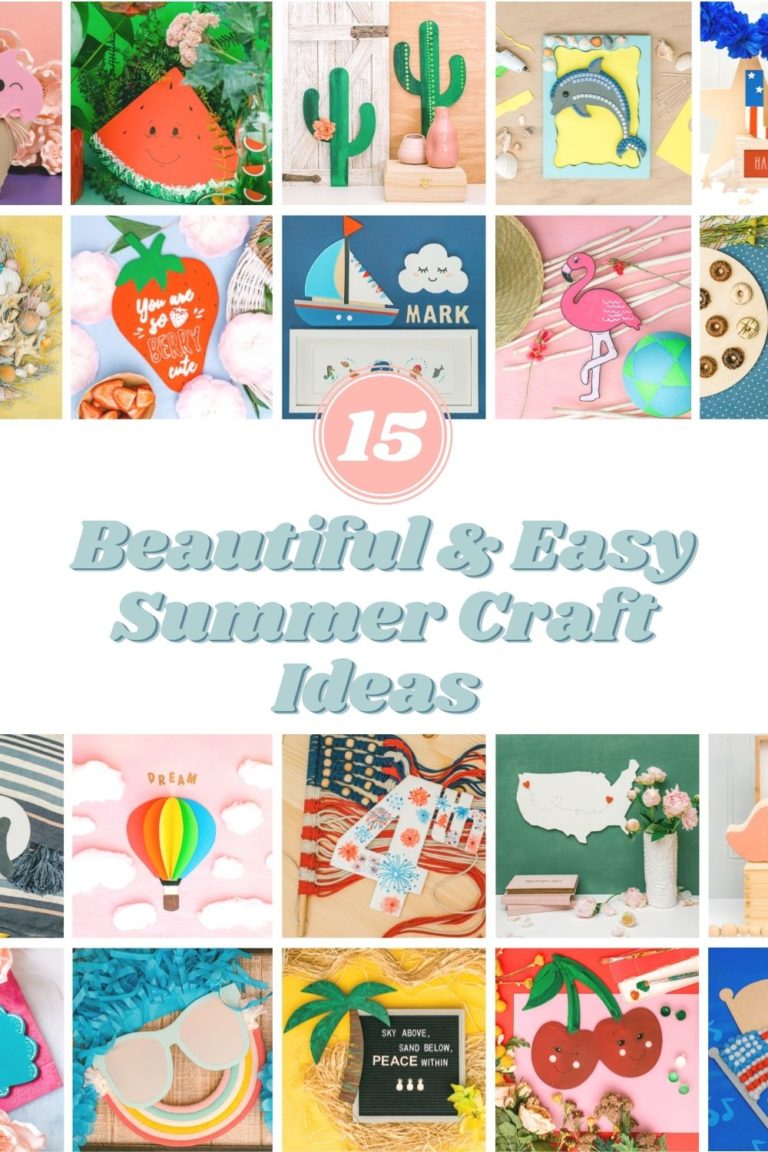
15 Beautiful & Easy Summer Craft Ideas for Adults and Kids
By: Woodpeckers Staff
Enjoy these step by step instructions to 15 of our favorite summer craft ideas for wood cutouts.
Here in New Jersey, we’re recovering from an overdose of cold rainy days. By the time the sun started showing its face, we were practically waiting at the door to welcome in summer.
Well.
We don’t get much of a say in the weather, but at least we get to choose what’s on our summer crafting table. When the summery crafts are out, we can pretend all is sunshine and beaches – even if outside it’s 50 degrees and raining!
So, whatever the weather is in your neck of the woods, can we tempt you with some summer crafts that are simple to make and splendid to look at?
Here are 15 favorites! Enough to keep you and your family busy for a while.
1. Prism-Painted Pineapple
Crafted by Sarah
How to craft it:
Use a ruler and pencil to draw evenly spaced lines on the pineapple cutout, going vertically and both ways diagonally.
Paint the sections in a random pattern (hey, random pattern – that’s a cool oxymoron!), using one color family on the crown of the pineapple, and another one for the “fruit”.
Before you paint each section, border it with masking tape to keep the paint inside the lines.
Crafter’s note:
What I love most about this summer decor project is that 3-d, diamond-y look. Isn’t it just so, so pretty? – Sarah
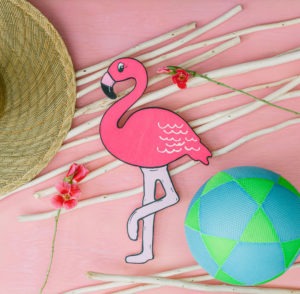
2. Nifty Flamingo
Crafted by Sarah
How to craft it:
Paint the top and bottom sections of the flamingo cutout in dark and light pink paint.
Outline the sections with black paint marker once the pink paint dries.
Paint the eyes and the beak – copy off any flamingo clip art to get them in the right spot.
Crafter’s note:
I got the idea to add those white “squiggles” from a flamingo picture. But after they were done, I did not like them. Moral of the story: sometimes you gotta use your own artist sense. – Sarah
3. Funky Flip Flops
Crafted by Sarah
How to craft it:
Print out letters and trace them onto the flip flops cutout, then fill them in with paint. Let the paint dry well.
Print out straps, (or “toe holders” as I prefer to refer to them), trace them in the right spot. (Or if you really trust your visual judgment, just draw them!), then fill in with paint.
Optional: you can use neon paint for the letters, like we did.
Crafter’s note:
This was the first time I crafted with neon paint – I was just in a neon mood, so had to try it! Note: neon paint is not opaque, so it shows up better with white underneath.
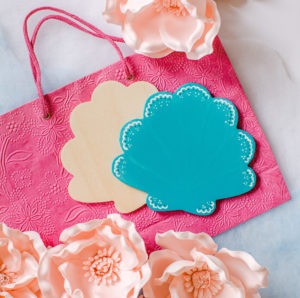
4. “Scalloped” Seashell
Crafted by Sarah
How to craft it:
Paint the background of the seashell cutout with teal colored acrylic paint (or whatever whimsical color you want your seashell to be) Let the paint dry.
Draw “mini scallops” on each of the seashell’s larger scallops with white puff paint.
Use a white paint marker to surround the puff paint scallops with little dots.
Crafter’s note:
If you look closely, you can see the grooves I tried to make using Mod Podge Dimensional Magic. It didn’t quite work out, but our motto at Woodpeckers is: There’s no such thing as “wrong” when it comes to art! – Sarah
5. Hot air balloon
Crafted by Sarah
How to craft it:
Trace, and cut out the balloon shape on 5 different colored papers, and fold them all in half.
Glue down the outer colors first (red and blue), and then add the three middle colors, with each “half balloon” glued to the one next to it.
Color the basket brown using wood stain to create a woodsy basket kind of feel.
Crafter’s note:
It was fun using paper instead of paint this time! And it also makes a great summer craft for kids. – Sarah
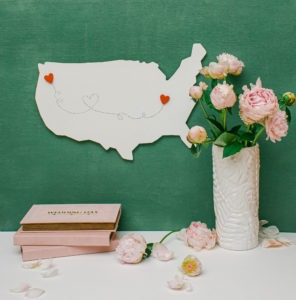
6. Meaningful Map
Crafted by Sarah
How to craft it:
Paint the map cutout background. We chose white paint because it’s the perfect bright background for the red hearts. Let paint dry.
Paint two Woodpeckers mini hearts red, and glue them down on the map wherever you and your loved one live. Tacky glue works well for this.
Hand draw the dotted line connecting the two hearts with a thin sharpie marker. If you’re not sure your hand is steady enough, draw it in pencil first!)
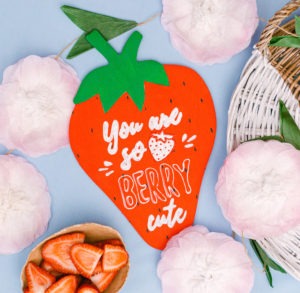
Draw the black seeds using permanent marker or black paint marker
Print the message, trace it onto the cutout, and fill in with black puff paint. Leaving the word “berry” outlined with no fill makes it stand out.
Crafter’s note:
Here’s my hack whenever I trace letters and shapes: I type the words inside a shape that’s about the same width and height as my cutout. Then I place the printed paper on top of the cutout and trace, pushing down with the pen to create a slight indentation in the wood. – Sarah
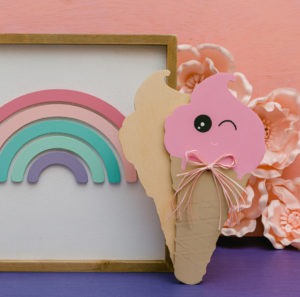
8. Talking Ice Cream Cone
Crafted by Sarah
How to craft it:
Plain ol’ paint! Pink on the top, light brown on the bottom, and don’t forget to add some drips! Yummmmmm. Let paint dry on theice cream cone cutout.
Make a fun little smiley face using paint marker.
(Optional) if you like the faded “grooves” on the cone, draw them in pencil, and then paint over them with a thin layer of the light brown paint.
Add a tiny ribbon for a surprising but perfect addition.
When I first picked up this cutout, I didn’t know what to do with it. I mean, ice cream is ice cream. Then I decided that if Renee’s watermelon can have expressions, so can my ice cream. Personally, I find that ice cream just talks to me. Agree?
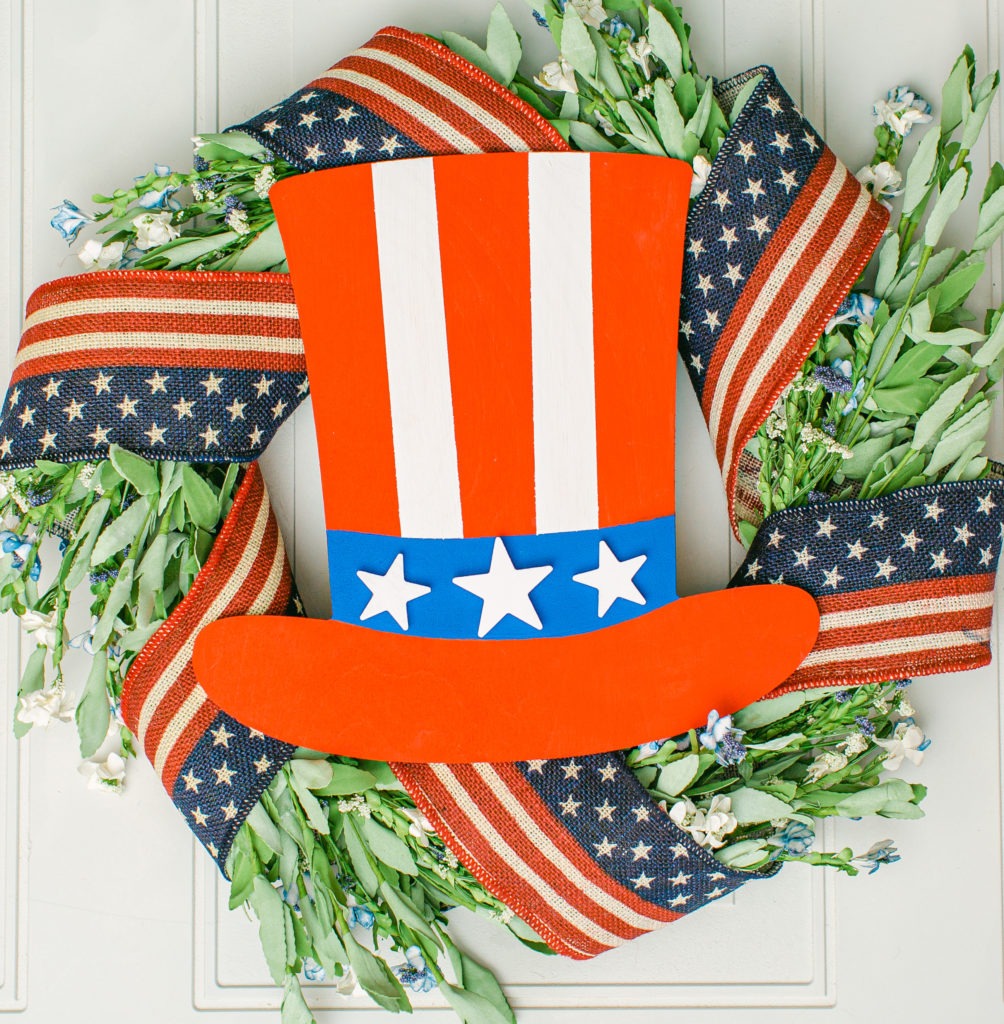
9. USA & Uncle Sam Hat – Patriotic Paraphernalia
Crafted by Sarah
How to craft it:
Paint your USA or Uncle Sam hat cutout in alternatingly red and blue strips – use masking tape to keep each color sharply separate.
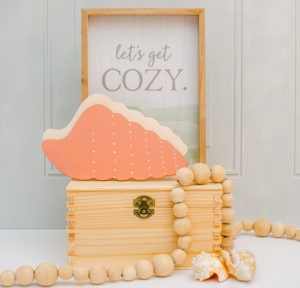
Paint the conch shell cutout a soft, light color – like this peach. Let paint dry.
Draw white puff paint dots from end to end in between the “bumps” to mimic the spiral grooves of a conch shell. (Notice how the last line only goes partway, like a real spiral)
While the puff paint is still wet, shake some white-clear glitter dust over it. When the puff paint is dry, shake off the leftover glitter and you’re left with a perfect subtle shimmer.
Dainty and delicate is my favorite kind of pretty – can you tell? 😉 – Sarah
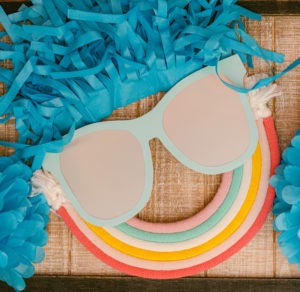
11. Super-Simple Sunglasses
Crafted by Sarah
How to craft it:
Trace the shape of the sunglasses cutout on two different colored papers. (We used shiny peel and stick paper in gray and teal)
Cut “lenses” out of the paper you’re using as the frame (teal)
Paste the background color (silver) onto the wooden cutout, and paste the “frames” (teal) on top of that.
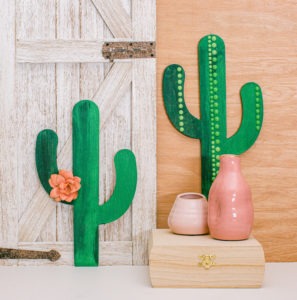
12. Enchanting Cactus
Crafted by Renee
How to craft it:
Choose a collection of paints in multiple shades of green
Using up and down strokes, paint the cactus cutout, mixing the colors slightly but not fully blending. I painted a darker blend toward the right and a lighter blend on the left. Let paint dry.
Add enamel sticker dots, and a pretty flower! Because every project needs a little finishing touch to “make it”.
Crafter’s note
This one is an ideal summer craft for teens and adults: sophisticated but not difficult. Enamel sticker dots are a favorite (expensive) art supply that I treat myself to once in a while. – Renee
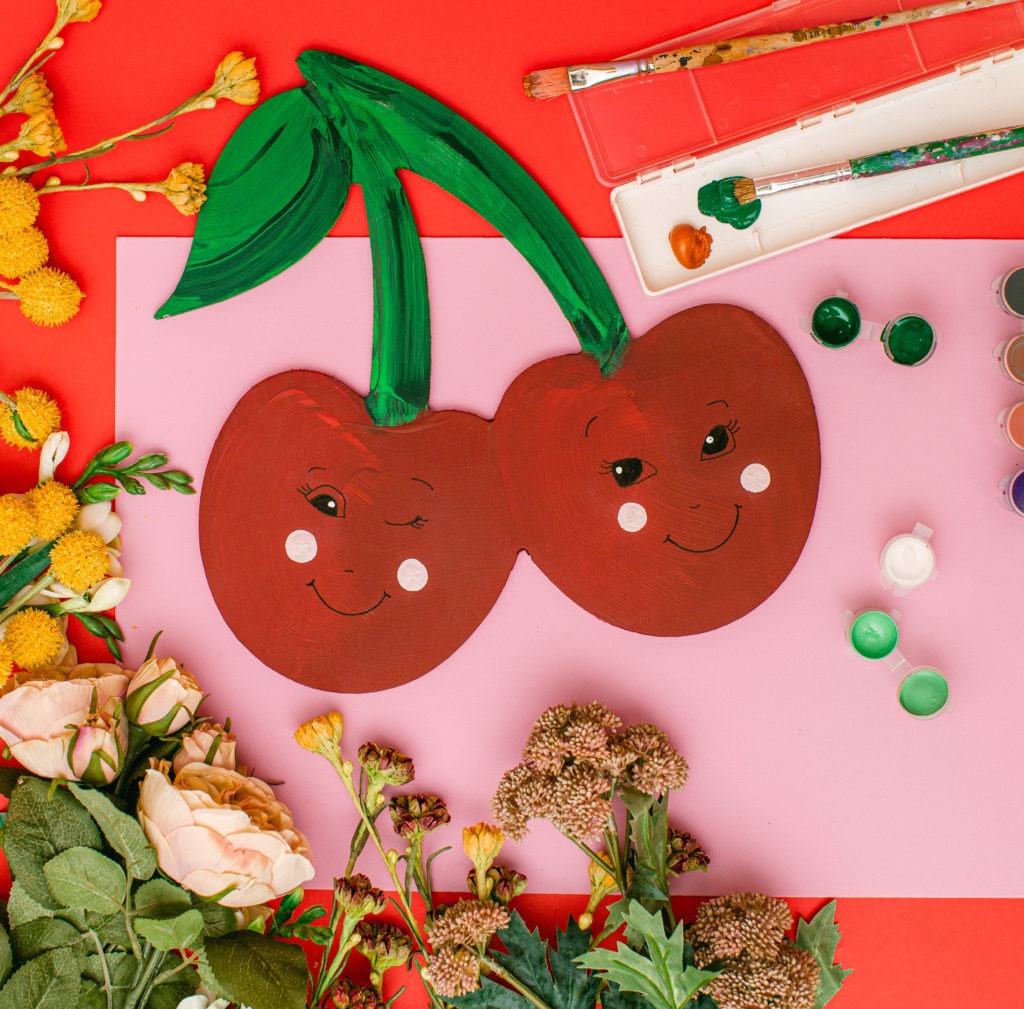
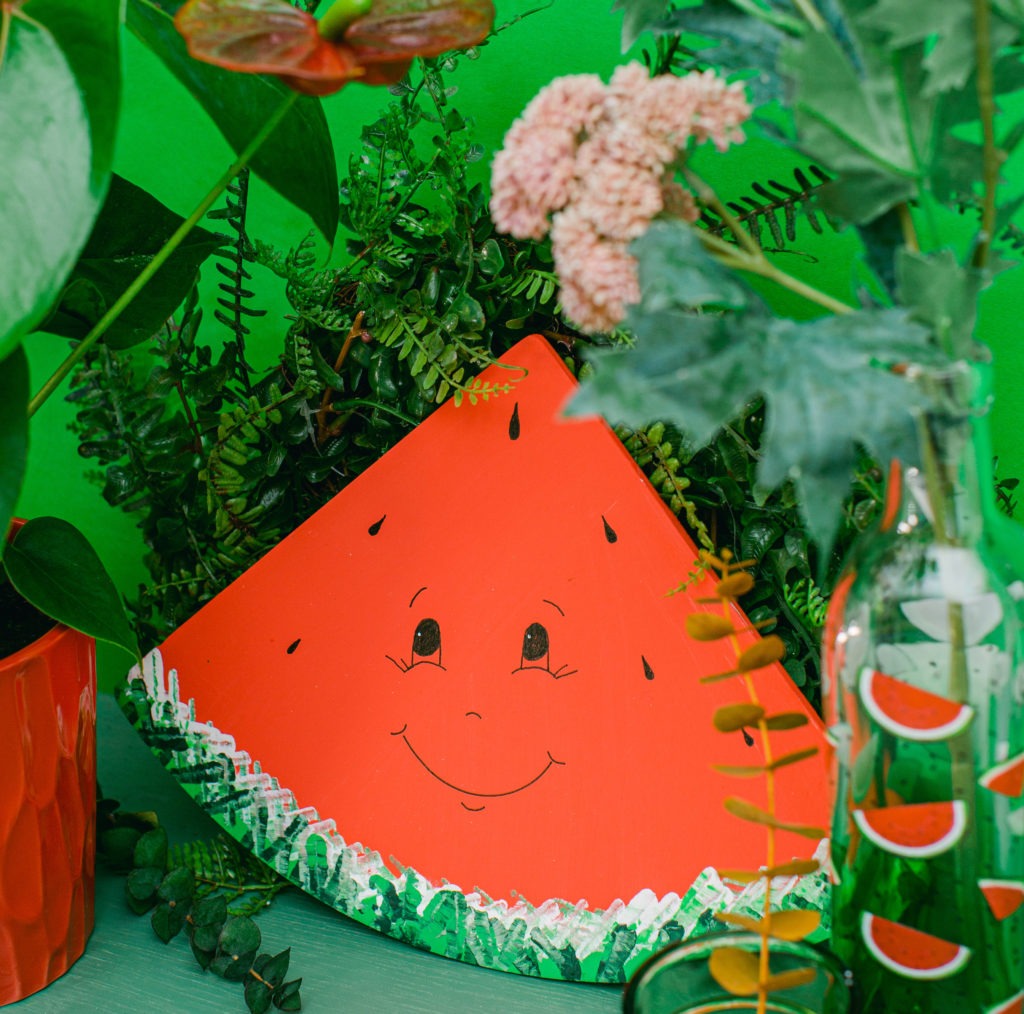
13. Cheery Cherries and Watermelon Slices
Crafted by Renee
How to craft it:
After painting the cherry/watermelon backgrounds solid (with a white and green “crosshatched” rind for the watermelon), let dry well, then draw cute faces on them with a paint marker.
Add a dot of white nail polish for the white in the eyes, and now the face is alive! For bonus points, make sure the two cherries are looking at each other.
Use a sponge stamper brush for those perfect circle cheeks on the cherries.
Crafter’s note
I ordered the watermelon colored paint from 3 different companies, looking for juuuuuuuust the right shade. Thankfully, one of them hit the mark, and I still have that treasured bottle! – Renee
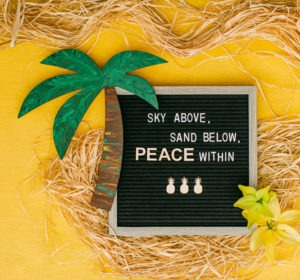
14. Artsy Palm Tree
Crafted by Renee
How to craft it:
To get that very artsy look, you’ll need a bunch of carefully chosen “random” paint colors. ( I used red, green, and yellow.)
Paint the trunk of the palm tree cutoutmostly with brown paint, but pick up a dot from the random palette with every brushstroke.
For the top, mix and blend a bunch of green paints so those leaves look textured.
To get that authentic palm tree look, use only horizontal strokes on the trunk, and vary your directions when you paint the fronds. After the fronds are done, paint one long stroke of darker green down the center of each.
Crafter’s note: What’s cool about this easy-to-DIY project is that it has such fantastic effects, and it’s all made of… paint! – Renee
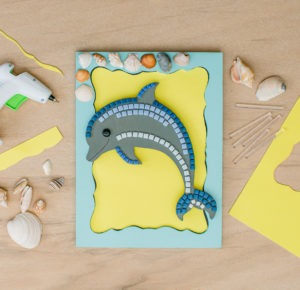
15. Dolphins
Crafted by Renee
How to craft it:
First things first, paint your background dolphin color (it’s fully okay if the accuracy of your “dolphin color” is a stretch), and let it dry.
Glue down small square ceramic tiles on the dolphin cutout. (Yes, the ones in the picture are ceramic. Mistake them for foam tiles at your own risk – Renee will not be pleased.)