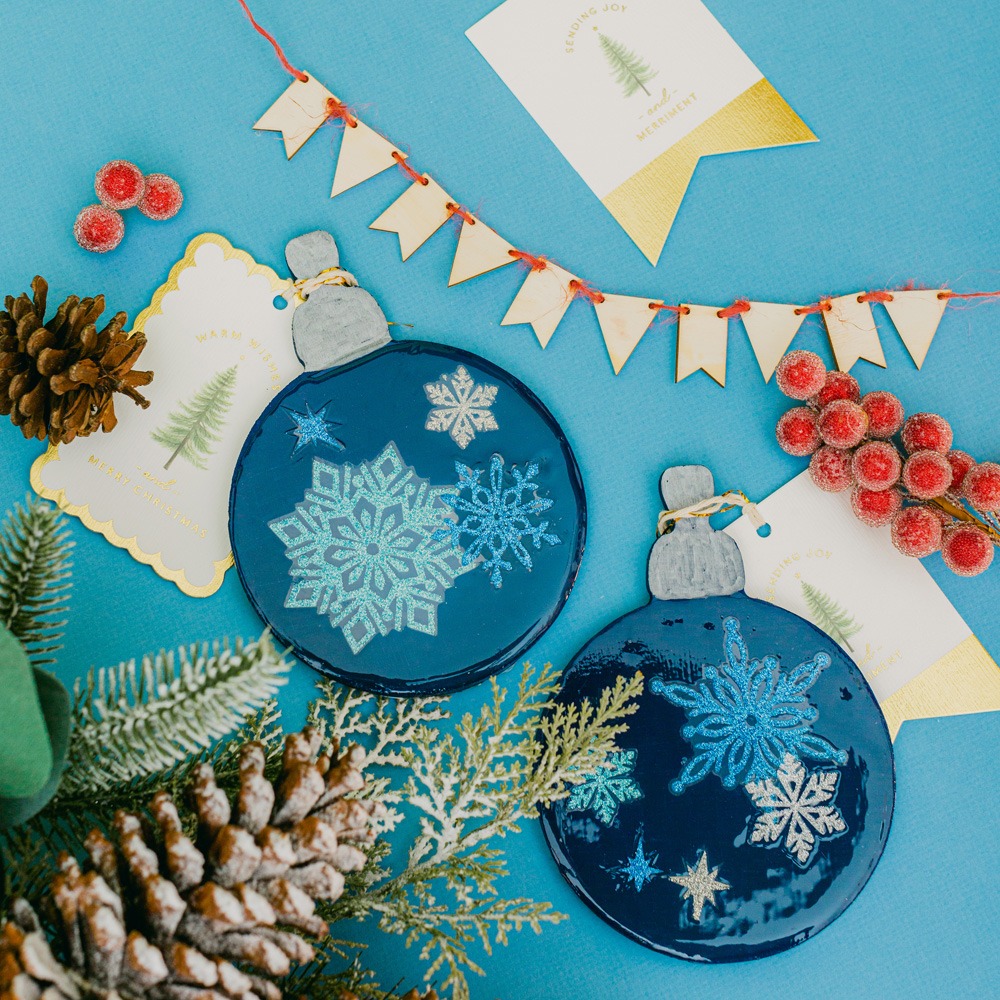
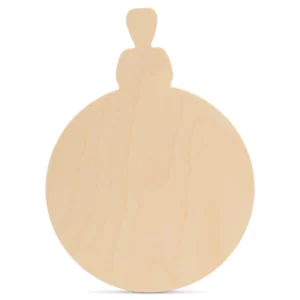
For this specific craft I really wanted something with a more rounded look, (like an actual ornament), but alas, working with wood cutouts I don’t have that luxury.
No matter, this is where a crafter’s touch kicks in!
I went with a product by Modge Podge, called Dimensional Magic. Let me tell you – they mean MAGIC! I was incredibly pleased with the results. Instead of just giving a sort of shine, or slightly dimensional – it looked literally round! Far more than I expected to be!
Anyway, let’s get right into it!
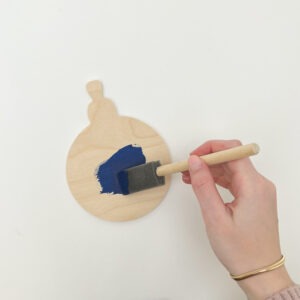
BASE IT:
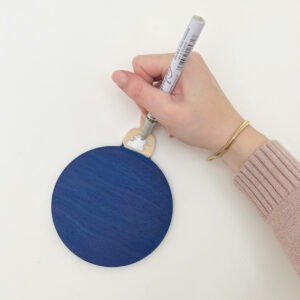
The first thing I did was paint the whole ornament cutoutwith a deep navy. I adore the blue family, and thought navy-blue would look especially lovely as an ornament. To get the silver color on top, I used a metallic paint pen! (If you are not familiar with paint pens – I highly, highly recommend getting into them, a total game changer for the hard-to-do detailing!)
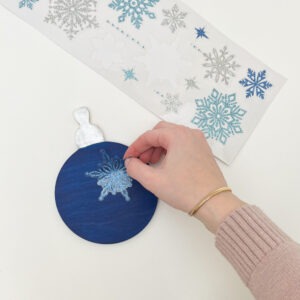
STICK IT:
After the paint dried, (and I got some laundry done), I went back in with some gorgeous, really-sparkly-minus-the-mess snowflake stickers I picked up, and laid them out on top. You can also overlap the stickers a bit to give an even more dimensional look. The next thing I did was the icing on the cake, literally.
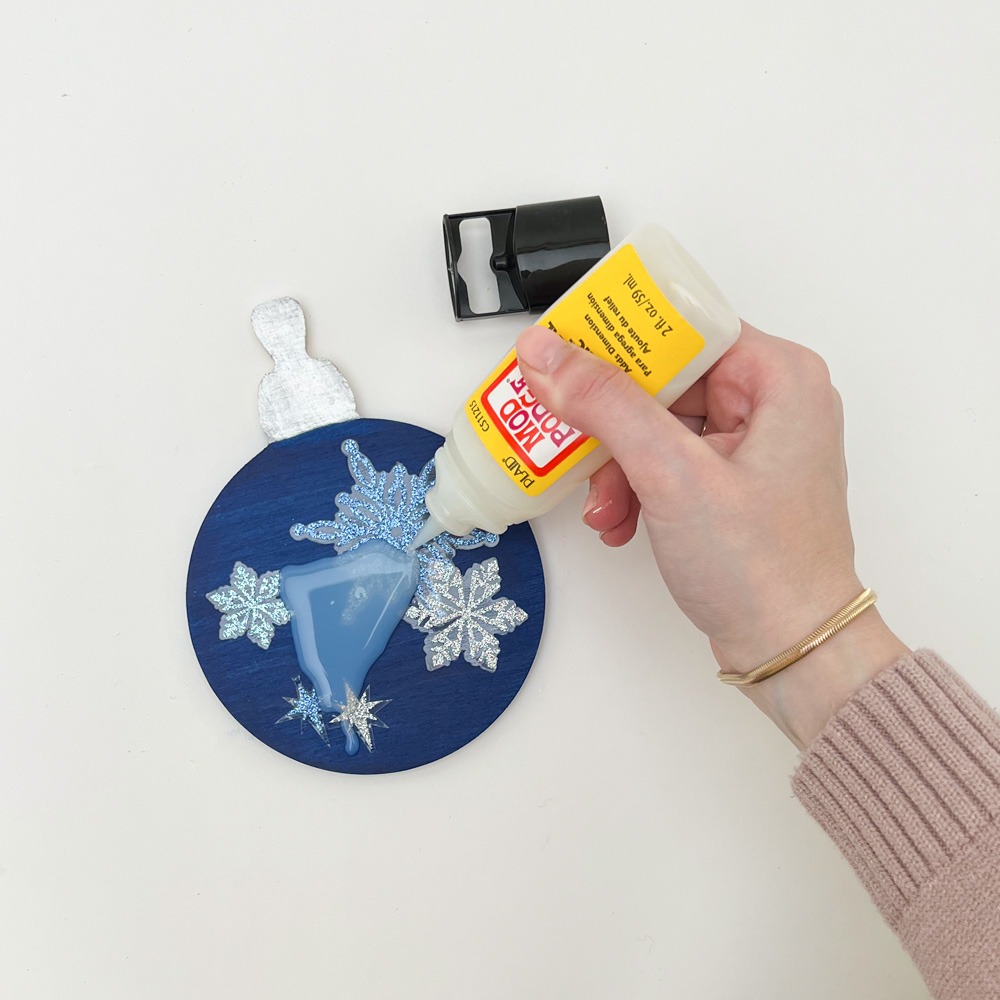
POUR ON SOME MAGIC:
I poured on a nice, thick layer of Modge Podges’ Dimensional Magic and voila – a beautiful, glass-like ornament was born. The absolute best part though, is that it’s actually wood – so there won’t be any shattering with this guy! I hope…
FURTHERMORE…
A few pointers to keep in mind while crafting are that; you can add more stickers on top of the layer of Dimensional Magic, and then a second layer of Dimensional Magic for a more, well, magically dimensional look! Take it from me, you will be staring at this beauty all season long.
Also, if you’re thinking of other ways to decorate it aside from stickers, I found that this same method looks beautiful paired with some glitter, or even some gold/silver flakes. Check this out:
Well, that’s pretty much the gist of it, I think. Now go ahead and start mapping out those tree decorations! Be sure to leave lots of room for your newly crafted wood ornaments!