Valentine’s Day Cookie Wreath with Woodpeckers Crafts
By Elizabeth Jones with Country Peony
Aside from Christmas, Valentine’s Day is my favorite holiday to craft for. Not just because my favorite color is pink, but the nature of Valentine’s Day lends itself to adorable handmade gifts and decorations. When I think of Valentine’s Day, I think of handcrafted decorations, pink and red color combos, and sweet treats. Today I want to bring you a really charming Valentine’s Day wreath that combines all of those Valentine’s Day elements. I am so excited to partner with Woodpeckers Crafts to bring you a Valentine’s Day Cookie Wreath.
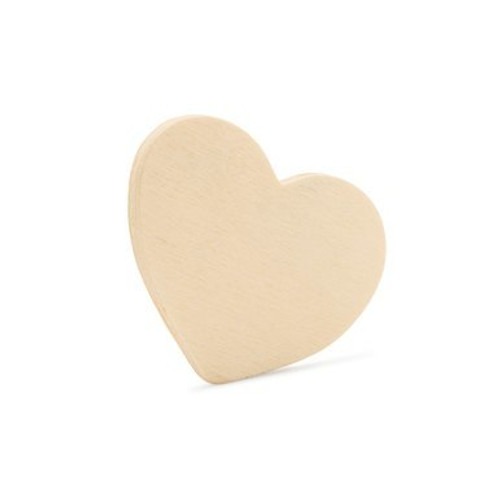
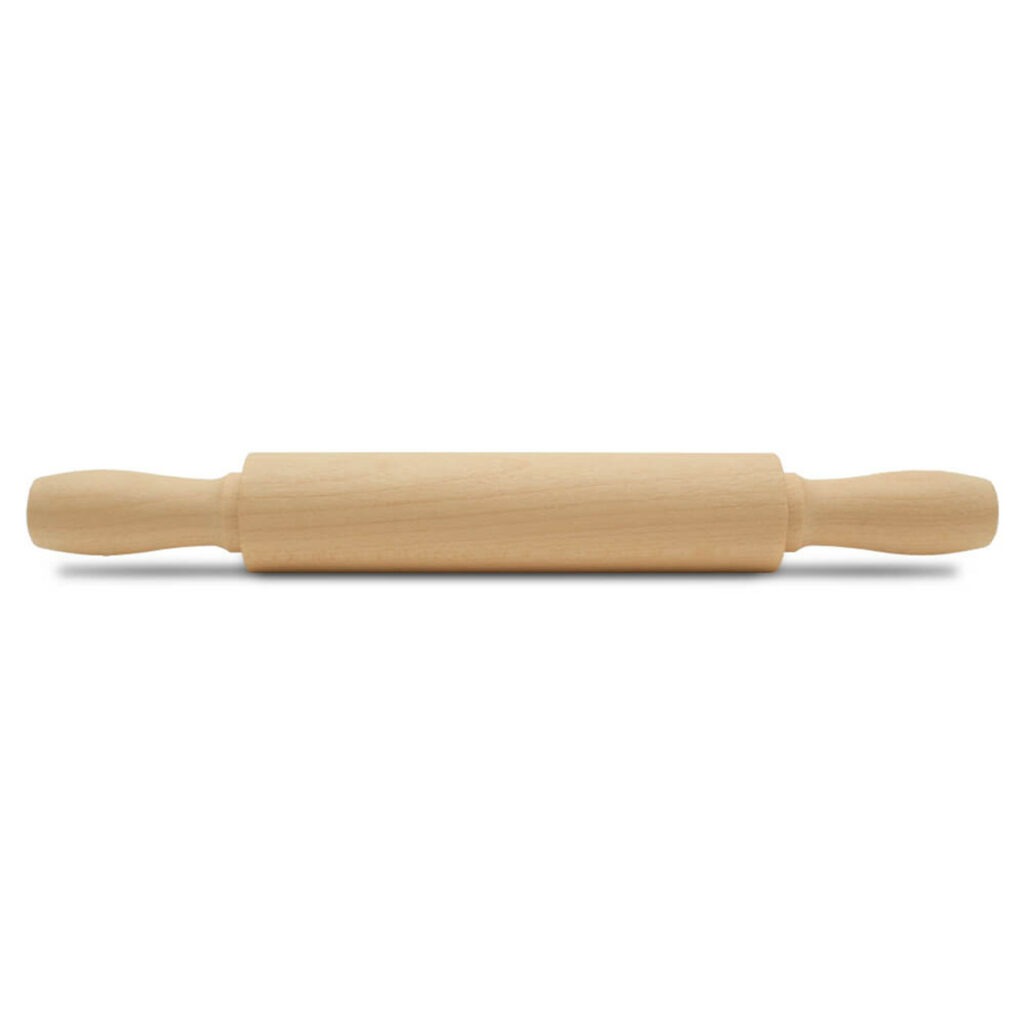
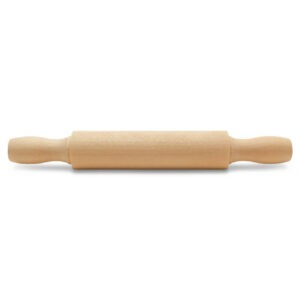
Woodpeckers Crafts has the best wooden craft products around, and when I saw their adorable heart cutouts and wooden rolling pins I knew I wanted to make a cookie-inspired wreath for Valentine’s Day. I chose a traditional red, white, and pink color palette, but the beauty with today’s DIY is that you can customize the color scheme and patterns to whatever your heart desires. My only suggestion is to have fun with it!
I absolutely love how charming this wreath turned out and I can’t wait to put it on display near my kitchenette in the Country Peony Studio. I also love how the natural wood finish of the wooden heart cutouts lend themselves to a sugar cookie making this wreath extra sweet!
Enjoy this video below showcasing how to create the project.
Continue below for the step-by-step picture tutorial to create your own DIY Wooden Cookie Wreath for Valentine’s Day!
To Make Your Valentine’s Day Cookie Wreath, you will need:
Craft Paint (For this project I used a red, light pink, and white)
Craft Paintbrush
Mod Podge
Hot Glue Gun with Hot Glue (not pictured)
Ribbon (not pictured)
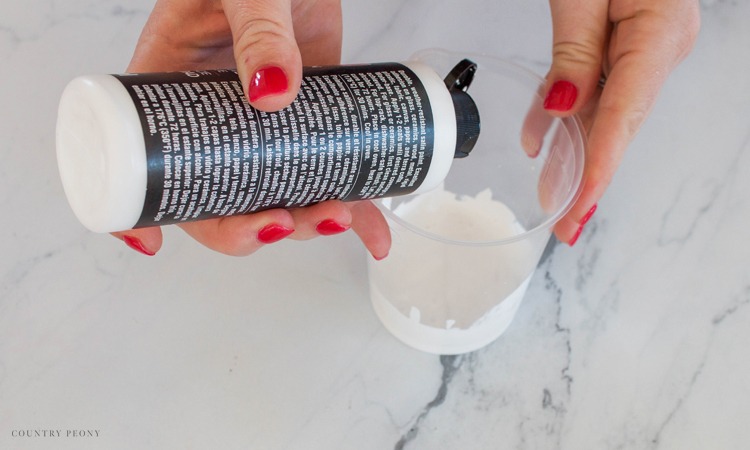
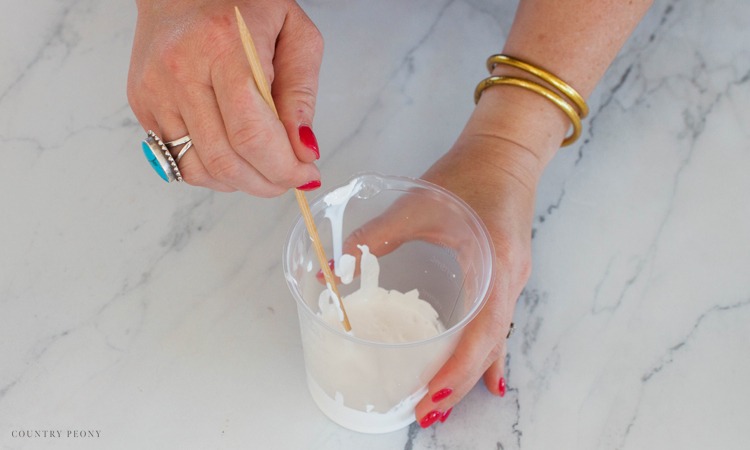
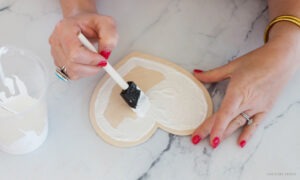
Mix the Mod Podge and Craft Paint to Create the Icing for the Wooden Cookies
To make the icing, I wanted to create a glossy effect with some dimension. So I chose mod podge as the medium for the icing. Mix the mod podge with acrylic paint to create the desired icing color that you want.
In a disposable cup, mix about a ¼ cup of mod podge with a ¼ cup of acrylic paint.
*I chose white for my icing, but you can do whatever your heart desires.
Then mix the paint and mod podge together until it is fully integrated.
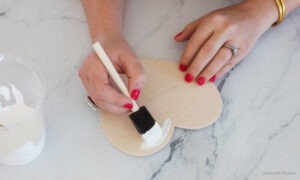
Paint the Mod Podge Icing onto the Wooden Hearts
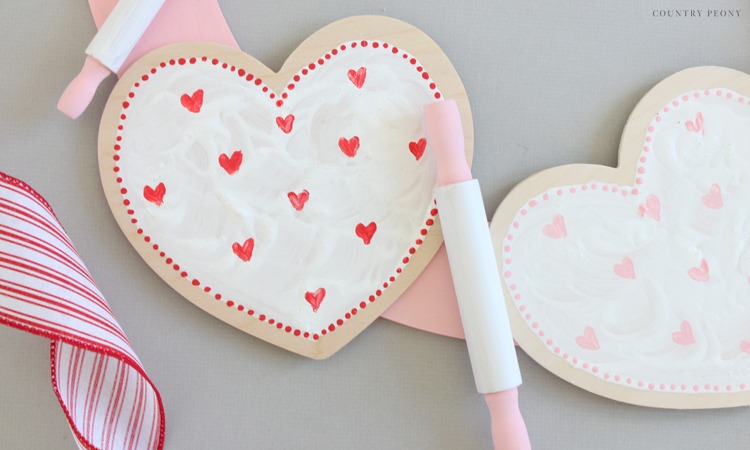
With a foam paintbrush create an outline of the heart with the mod podge paint onto the wooden heart. I recommend leaving some of the natural wood grain of the wooden heart on the edge to make it look like a frosted cookie.
Once the outline of the heart is complete, paint the inside of the heart with the rest of the mod podge paint. Use your paintbrush to add more mod podge paint in certain areas, and to create fun brushstrokes that mimic icing.
Let the mod podge paint dry.
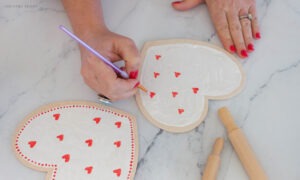
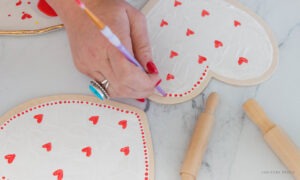
Add Decorative Details to the Painted Cookies, and Paint the Rolling Pins and Wreath Form
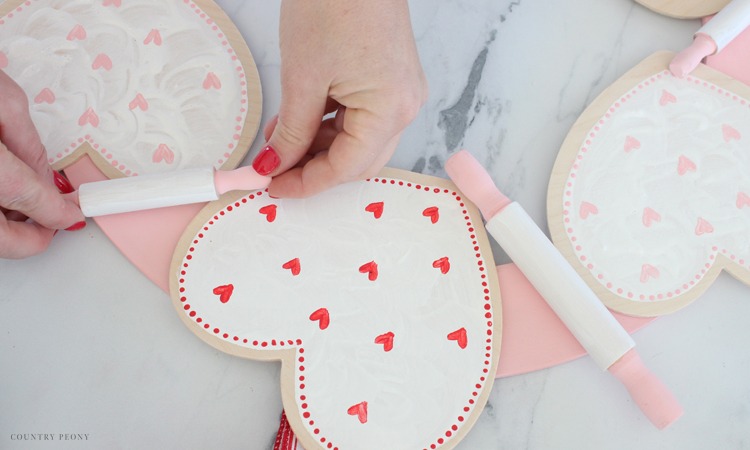
Once the paint is dry, use a small craft paintbrush to add decorative details to the painted cookie.
I chose tiny hearts and a small dot border for my cookies, but you can choose whatever pattern you want.
Keep in mind that the uneven surface of the icing paint makes it hard to get the designs perfect. But, I believe that adds to the handmade charm and it makes the wooden hearts look more like cookies.
*Helpful tip: use the back of the paintbrush to add dots.
Continue to decorate the wooden hearts to create cookies. For the 18” wreath I painted 6 wooden hearts (3 with red accents and 3 with light pink accents).
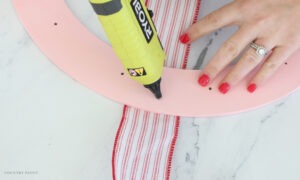
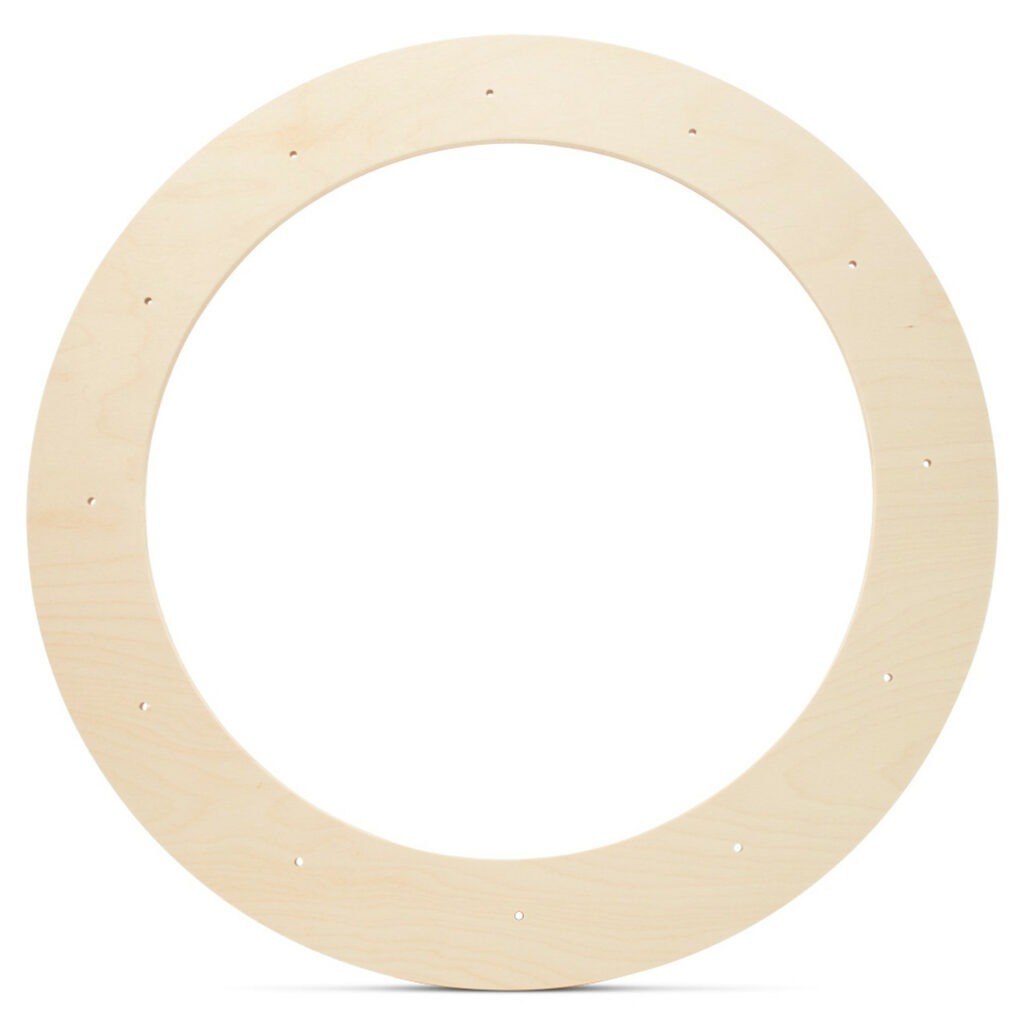
Then, paint the wooden rolling pins and wooden wreath form. I chose light pink for the handles of the rolling pins and for the wreath form, and I chose white for the inside of the rolling pins. I used (3) 5” rolling pins, and (3) 7” rolling pins.
Let everything dry.
Assemble the Cookie Wreath
Once everything is dry, it is time to create the wreath.
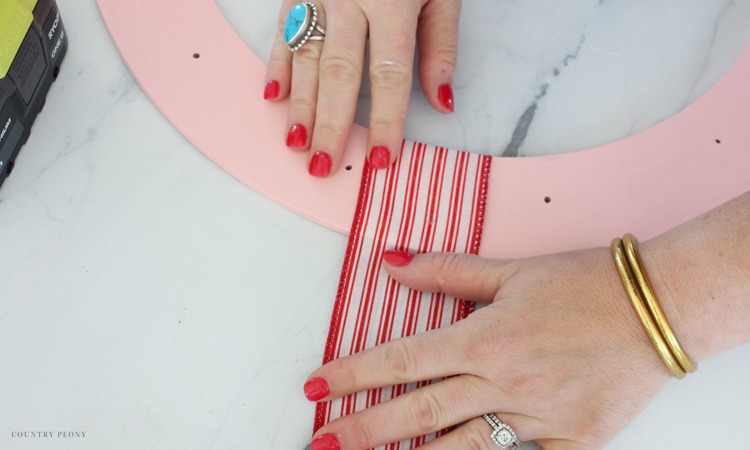
First step is to the create the wreath hanger with a pretty piece of ribbon. I chose a 2 inch red striped wire ribbon for this project. I love how the red stripes help the decorative elements of the cookies pop out.
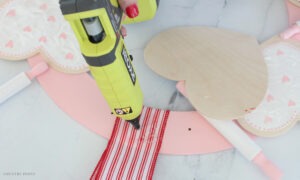
Hot glue both sides of the ribbon to the top of the wreath form.
Arrange the painted hearts and rolling pins onto the wreath form to determine placement. Once you are happy with the placement, it is time to attach the painted wooden pieces to the wreath.
One at a time, apply hot glue to the wreath form where the wooden pieces attach to the wreath.
Gently press the pieces onto the wreath to create a secure hold.
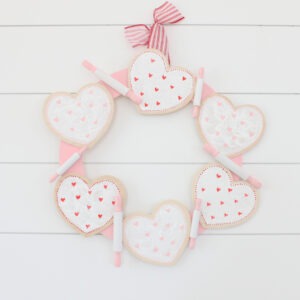
Display your Valentine’s Day Cookie Wreath!
Find your favorite blank wall, mantle, or interior door and hang your wreath for all to enjoy this Valentine’s Day!
I just love how charming this Valentine’s Day wreath turned out!
As with all of Woodpeckers Crafts products, the creative possibilities are endless! I hope you enjoy crafting with Woodpeckers Crafts this Valentine’s Day!