Hey crafty friends!! Do I have a treat for you today!! I have teamed up with my friends at Woodpeckers Crafts to bring you this beautiful spring wood egg garland DIY.
Let me just briefly tell you a little bit about Woodpeckers. First of all, what I love most about this company is that it started out super small. This crafting company was founded out of a tiny home by an artsy mom and a handy dad who have grown it into a magnificent company that offers quality wooden craft parts for all your crafting needs!
When I was browsing on their website and saw these gorgeous wooden eggs, I knew I had to have them for a springtime craft.
So today, I am going to show you how to make a unique wood-beaded garland using these eggs and some of their fabulous wooden beads. The best part is, Woodpeckers has taken my DIY and turned it into a kit! YAY!! So you can buy all the wood parts you need in one easy bundle here.
Let's dive right into the project!
Step One
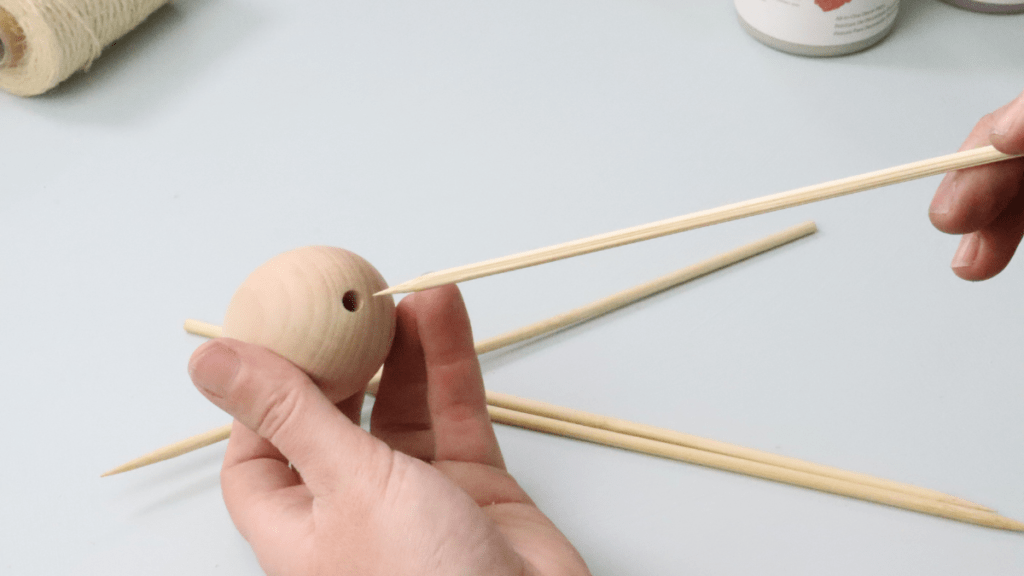
To begin my project, I took my drill and using a 3/16″ drill bit, I drilled a hole through my 6 wooden eggs. You can see here that I am holding the egg with my hand but it is best to use a vise to clamp the egg so it doesn’t move. This will also help ensure your holes are straight through the egg.
Step Two
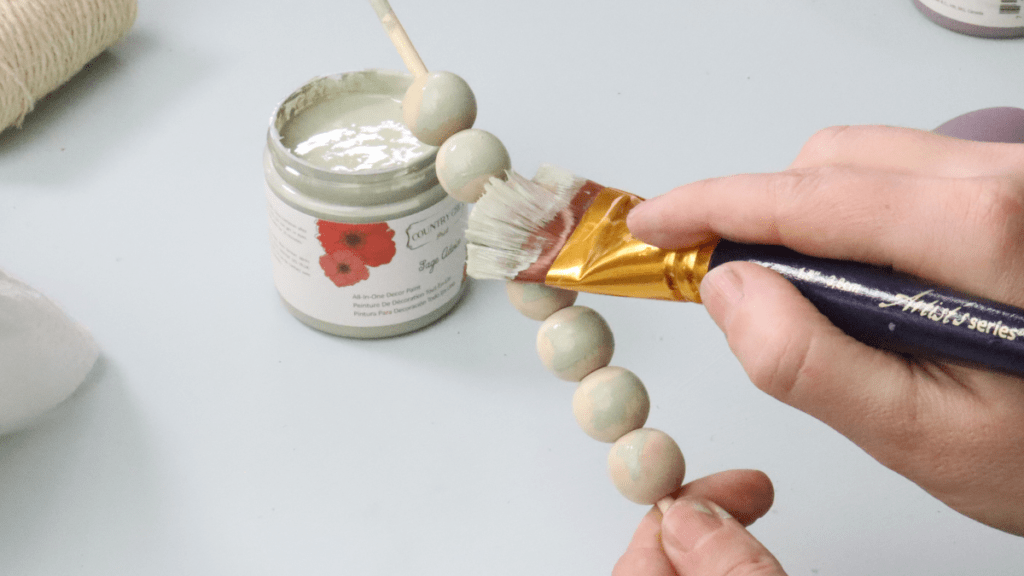
Once I had drilled holes through my eggs, I painted them. In this step you can get really creative and let your own style and design tastes shine. For my project, I chose three colors — Sage Advice, Full Bloom and Dreamcatcher. These paints are from Country Chic Paint.
Quick Tips for Painting Wooden Beads
Here are three different methods I chose for painting the beads and eggs:
method #1
Slide the beads or eggs on a wooden BBQ skewer and then you can hold the skewer while you paint the eggs and beads. As well you can also make a device like shown here, by using two pieces of craft foam.
method #2
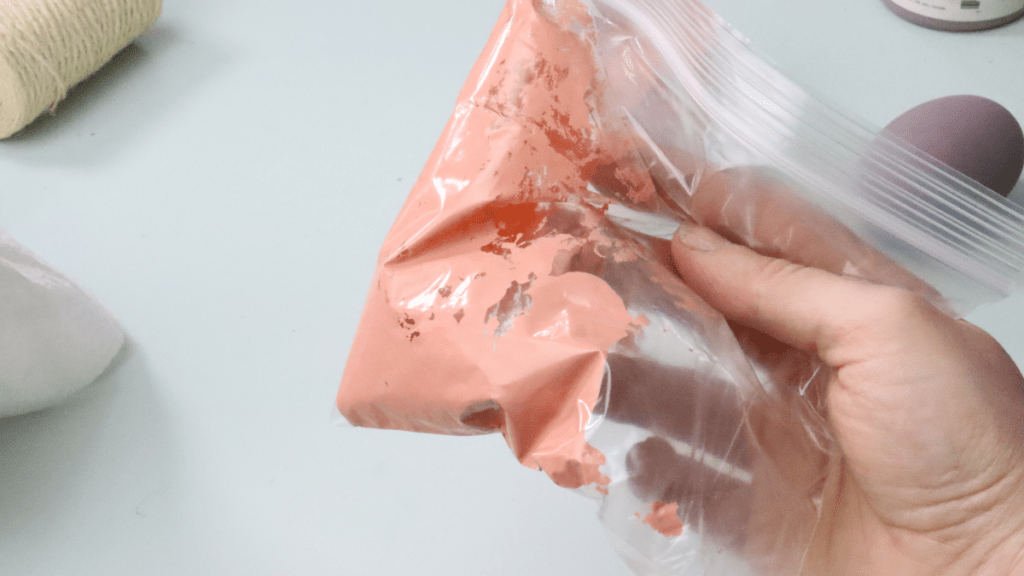
Place your beads in a plastic bag, add a bit of the paint and then shake the bag really well. Dump the beads back out onto a paper towel and let them dry.
method #3
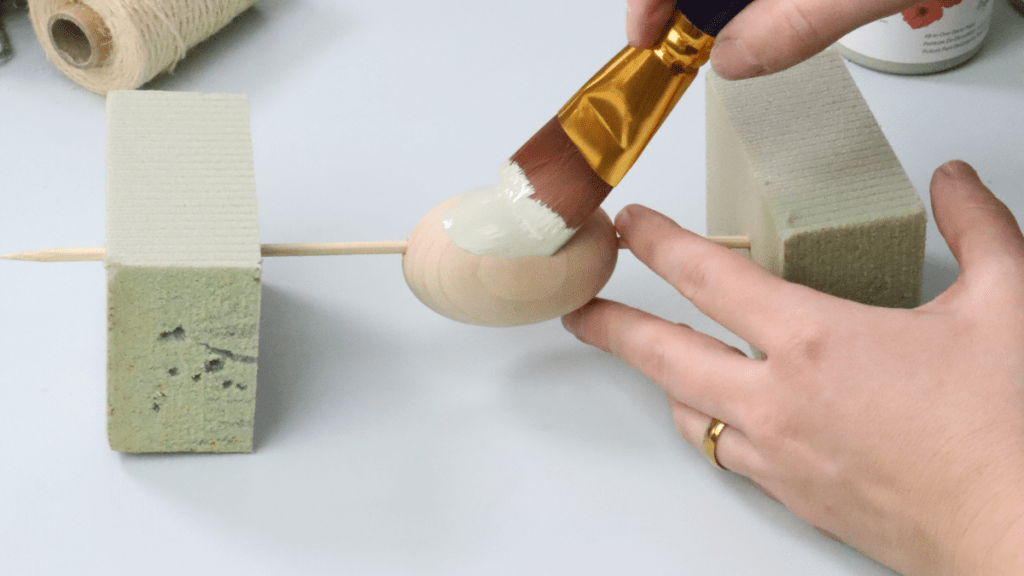
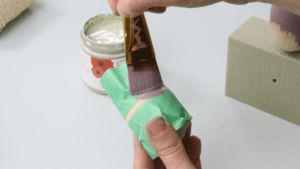
Use Painters Tape to mask off a section of the egg to allow some wood to show. This also gives you a spot to hold the egg while you paint.
Step Three
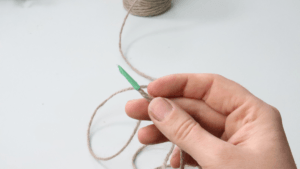
Once all my eggs and beads were painted and dried, I next took my jute string and wrapped some painters tape around the end of the string. This makes it easier to slide it through the beads without the string fraying.
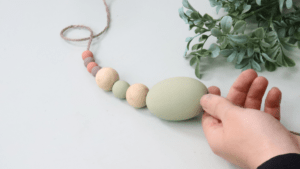
Step Four
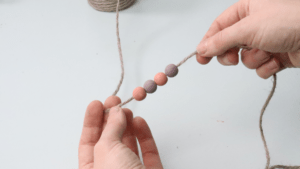
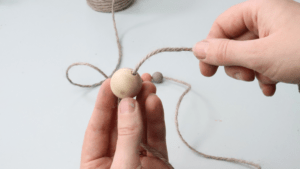
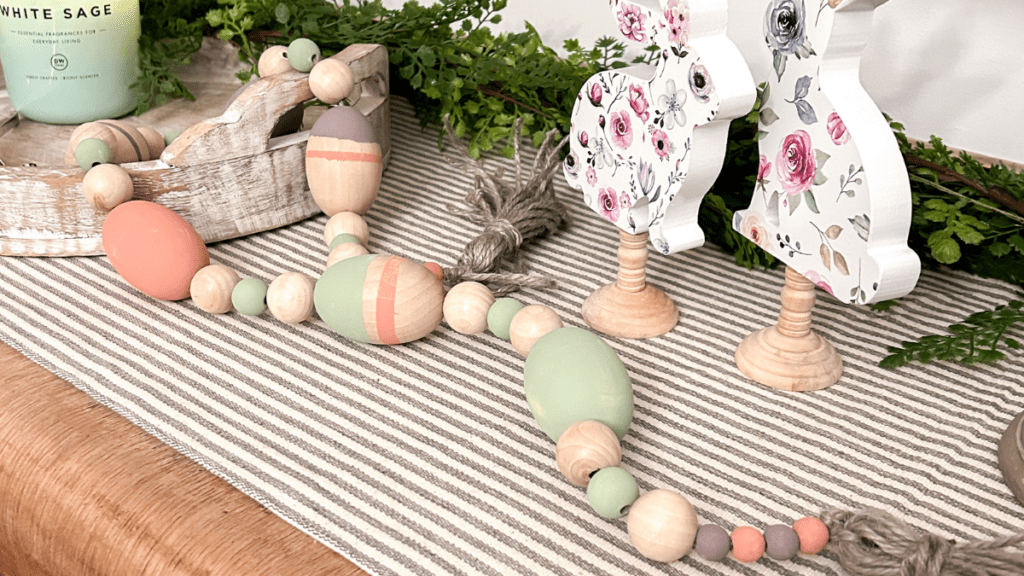
Slide the beads and eggs onto the jute string. This is the pattern that I used and if you decide to purchase the prearranged kit from Woodpeckers Crafts you can copy my pattern exactly:
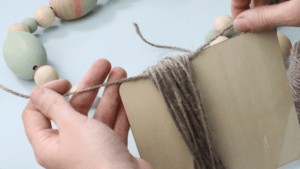
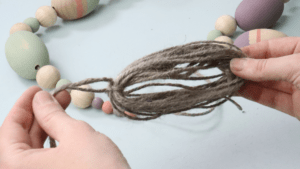
Once all the beads and eggs are on the jute string, I made two tassels for each end. To easily make a tassel, I find a scrap piece of wood that is about 6-8″ and then I wrap the jute string around it several times.
If you want a thicker tassel, wrap it more or for thinner tassels wrap it less.
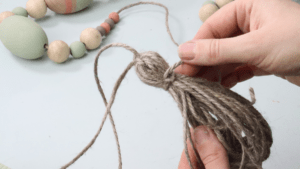
Next, I slid the piece of jute string that is about 10-15″ underneath the wrapped jute string and then pulled the jute string bundle off of the piece of wood and tied the jute string in a knot.
Next, I cut a second piece of jute string and then tied it around the bundle about 1/2″ below the knot of the first jute string.
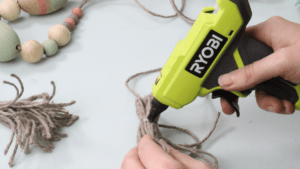
I used some hot glue to wrap the remaining amount of jute string around my knot for a more finished off look.
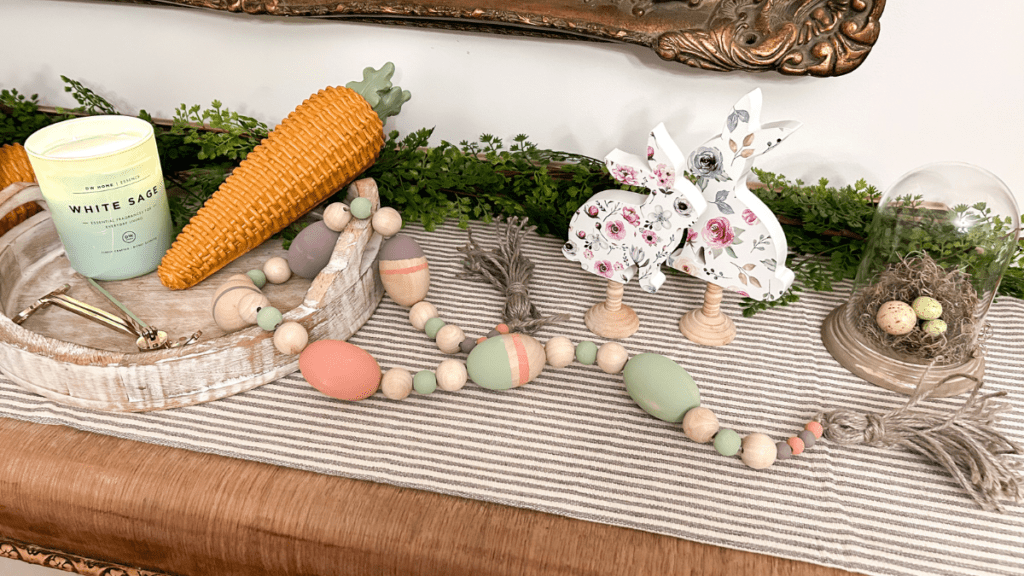
Step Six
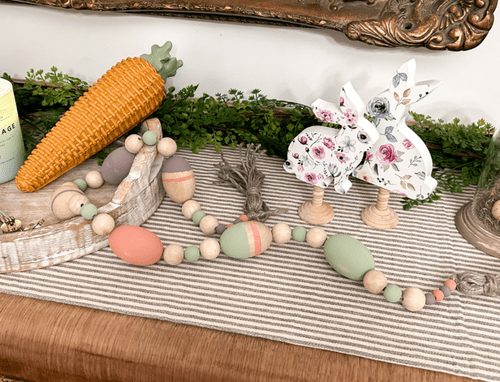
I made two tassels and tied them onto either end of my beaded garland. Here is the finished project all set up in my home on my Spring/Easter buffet hutch:
I am SO HAPPY with how this project turned out!! I love this new piece of decor to my Spring and Easter items and the best part is that I made it myself!
My favorite part of this project is how great the wooden beads and eggs are from Woodpeckers Crafts. The quality and craftsmanship of their products are so superior!
I really hope that this project has inspired you to get creative and make one for yourself and as I mentioned earlier, you can grab the kit to make one yourself right here. If you do recreate this project, I would LOVE to see your photos!