Decorating a nursery is always exciting, especially when you get to DIY it! Check out how we DIYed this adorable floating night light, and how simple it was!
What you'll need:
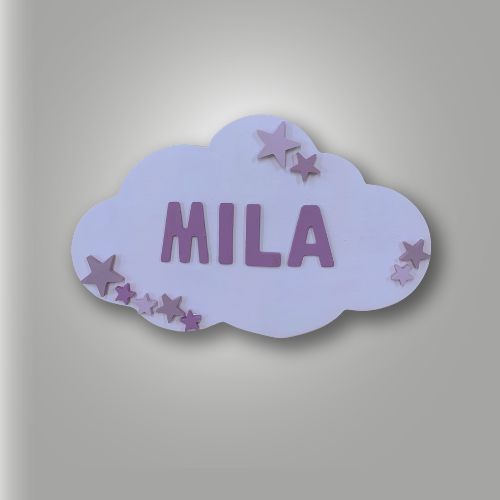
1 cloud cutout (or more if you would like to make some accent clouds as well)
Wooden letters for the name
Assortment of 3/4”, 1”, 1 ½”, and 2” star cutouts (10 in total)(If you will be making accent clouds aside from your main cloud, you will want about 20)
2-4 shades of Purple
Glue gun and glue sticks
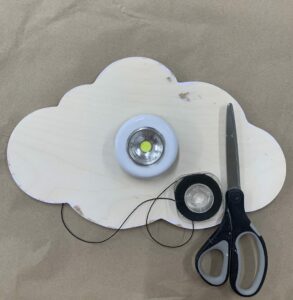
Battery-powered round lights
Strong thin string
Nail for hanging
How to get started:
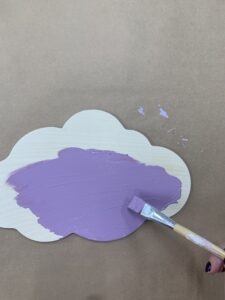
Get out the purple shade you want for your main cloud, I used my lightest purple shade, and paint it! While that’s drying you can start painting your accessorizing stars, in different shades of purple.
Next:
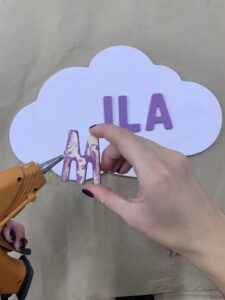
Now you could begin placing the name on your cloud, and then arrange the stars around it! Once you’re happy with your setup, you can glue it all in place and let it dry.
Finally:
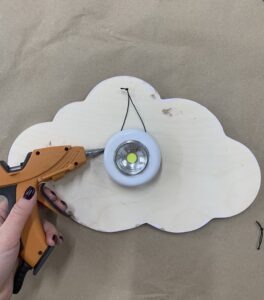
Once your cloud is ready to go, you can turn it over and hot glue the light to the center of the cloud. Tie the string around the light, secure it with hot glue, and let it dry.
Extra Pointer:
The light I used was domed, making it turn the light on when I pushed it against the wall. If you can’t get a light like that, glue a small piece of wood (such as an extra star) to the back.


This Post Has 3 Comments
Ame este detalle!!
Thank you! Perfect for a kid’s room or nursery!
You’re so welcome! It really is a lovely addition to any nursery or child’s room!