*This post was created through a paid partnership with Woodpeckers Crafts. However, all opinions are honest and 100% my own.
*This post contains affiliate links. For more information, please see my disclosures page here.
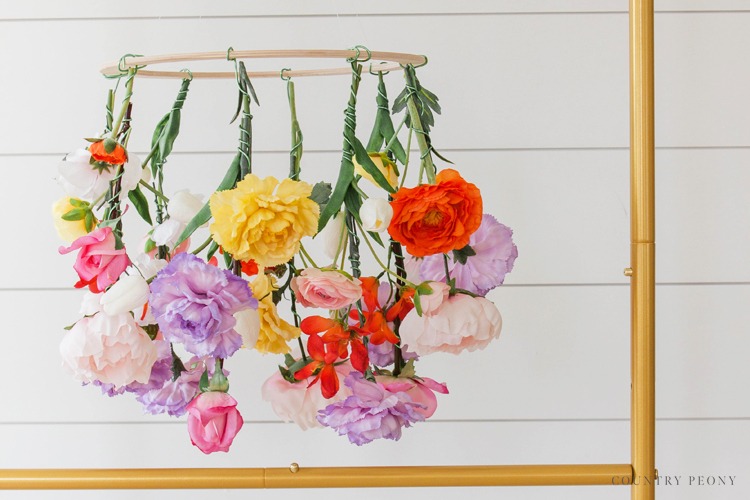
I find so much inspiration for my crafting projects from flowers during Spring! Today I have a really fun and whimsical DIY that is inspired entirely by Spring flowers. Instead of putting flowers in vases on the table this Spring, why not hang them as part of a beautiful chandelier? Today I want to show how you to make your own flower chandelier for your Spring decorations or for a fun party! This DIY is surprisingly simple thanks to the amazing wooden wreath form from Woodpeckers Crafts.
I love this DIY because it is fully customizable. You can change the size of the chandelier with Woodpeckers Crafts many different size wreath forms, and you can change the style and colors of the faux flowers to fit your design aesthetic. I hope this DIY inspires you to have a little fun with your decorations this Spring!
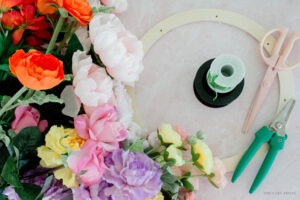
To make your own Easter vignette, you will need:
Woodpeckers Crafts Wooden Wreath Form in 13 Inches. Use code “countrypeony” for 5% off your purchase at Woodpeckers Crafts.
Faux Florals. I chose 5 different colors, and then picked Spring florals from the color palette. Include flowers in different sizes and various movement patterns. For example, the tulips like to fold over, whereas the small rose buds are more straight. The various colors, styles, and movement creates fun dimension with the chandelier.
Green Craft Wire. I chose a 12 gauge, bendable craft wire, but you can choose whatever wire you may have on hand.
Wire Cutter
Fishing Line
Scissors
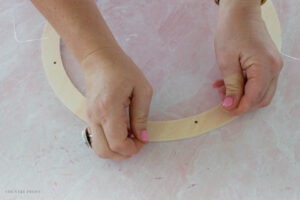
Attach the Fishing Line onto the Wooden Wreath Form
Cut 4 pieces of fishing line, then double knot the fishing line through 4 of the pre-existing wreath form holes.
*Make sure that the fishing lines are evenly placed on the wreath form.
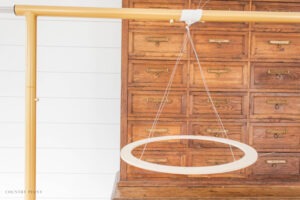
Hang the Chandelier
Take all 4 pieces of fishing line together and maneuver them until the chandelier is even. Then, tie the strings together into a knot at the top and attach the chandelier from a ladder, a ceiling rafter, or a clothing rack (like I did).
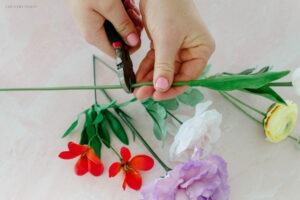
Prepare the Faux Florals for the Flower Chandelier
Use a wire cutter to cut off longer stems, and remove excess leaves from the florals.
Attach the Flowers Together with Craft Wire
Determine which flowers you want to bunch together as part of each chandelier section. I chose flowers of different colors, shapes, and sizes for each section.
Then, start at the bottom of the chandelier section with the largest flower. Wrap craft wire around the stem of the flower. One at a time add the next flower by connecting it with craft wire around the stem.
Continue to add the flowers to the chandelier section. I chose about 5 flowers each for my 8 sections.
Add the Flowers to the Chandelier
Use the craft wire to attach the flower sections to the pre-drilled holes in the wreath form.
Fluff out the flowers so that they all look even and extra pretty!
Enjoy the Flower Chandelier
Hang your floral chandelier wherever your heart desires! I hope it brings a lot of joy your way this Spring!
Thank you to Woodpeckers Crafts for providing me with their amazing Easter cutouts. As a reminder, if you want to create your own, please use code “countrypeony” to receive 5% off at checkout at Woodpeckers Crafts.
As with all of Woodpeckers Crafts products, the creative possibilities are endless! I hope you enjoy crafting with Woodpeckers Crafts this Spring! I can not wait to see what you make!
I believe crafting is more fun when we share our projects. Please email me at elizabeth@countrypeony.com, or please tag me @thecountrypeony or #countrypeony to show me your beautiful, custom creations!